X2600 H264解码
一 硬件环境
该文档使用的开发板为:PD_X2600E_VAST_V2.0开发板 芯片为 X2600E。内置 256MB DD3(L);外置 1Gbit SPI NAND = 1Gbit SPINAND Flash = 1024/8=128M。
二 功能简介
H.264是一种高性能的视频编解码技术,PD_X2600E_VAST_V2.0开发板含有H.264解码芯片,其参数如下:
君正X2600E H.264解码参数
最大分辨率: 2560x2048
最大解码能力: 1920x1080@60fps
输出格式: NV12
三 软件实现方法
由于H.264解码以后,需要进行预览。该文档使用解码后的图片保存到TF上进行保存,然后放到电脑上进行预览的操作。所以需要添加支持TF卡的配置。
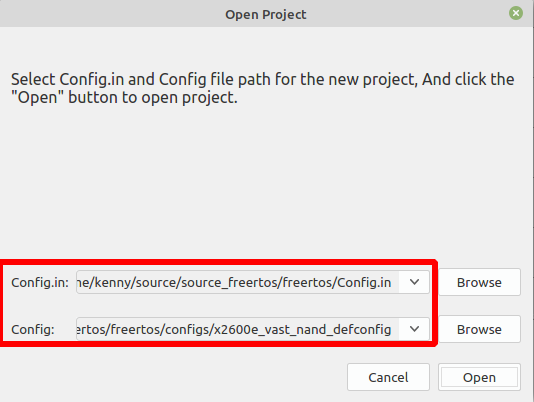
主配置选择 x2600e_vast_nand_defconfig
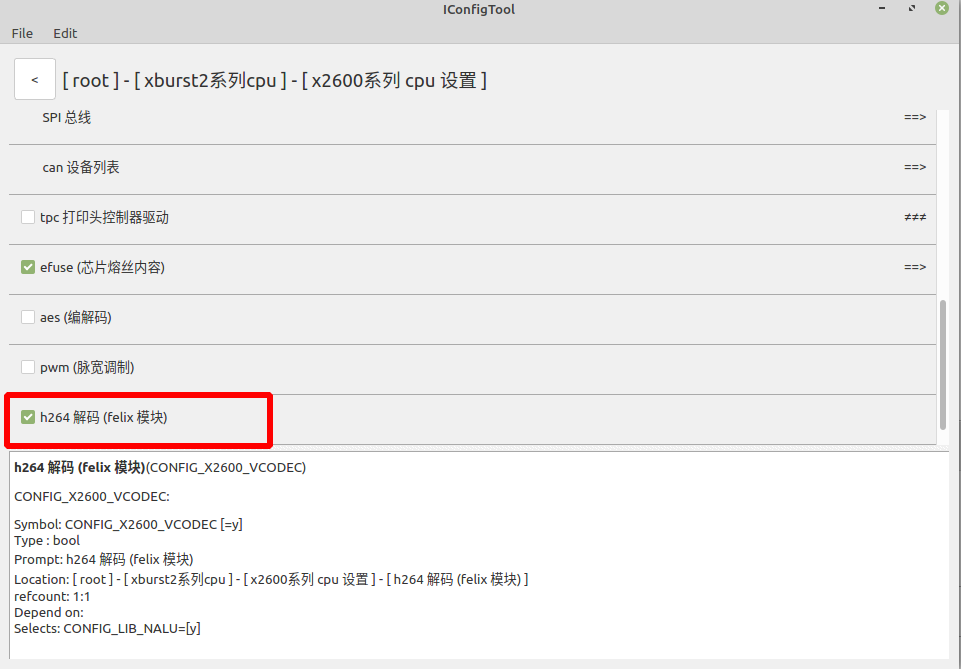
勾选h264解码(felix模块)
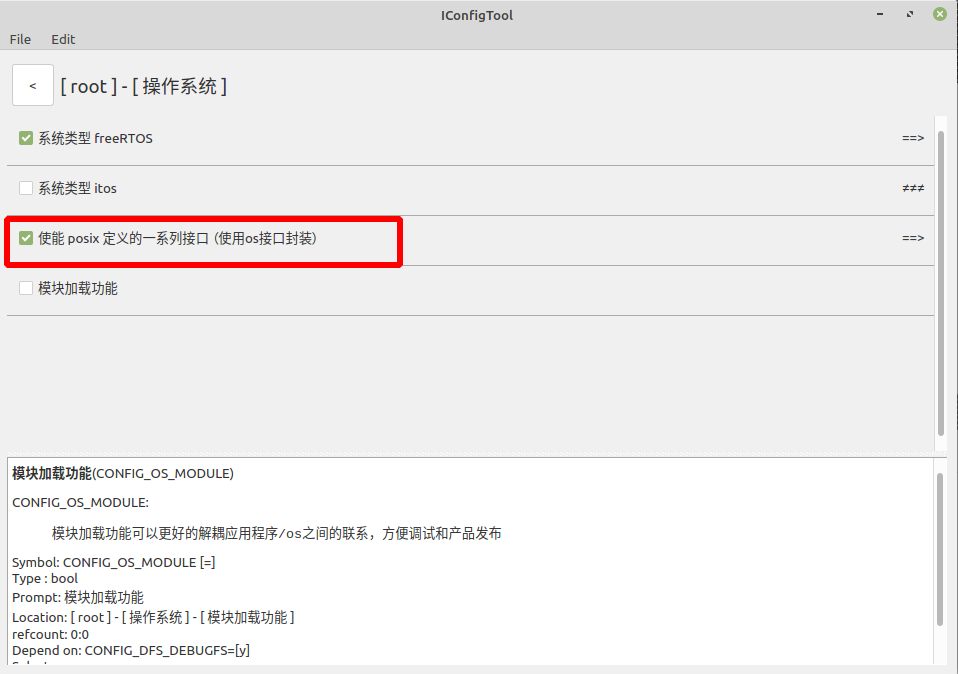
勾选使能 posix 定义的一系列接口 (使用os接口封装)
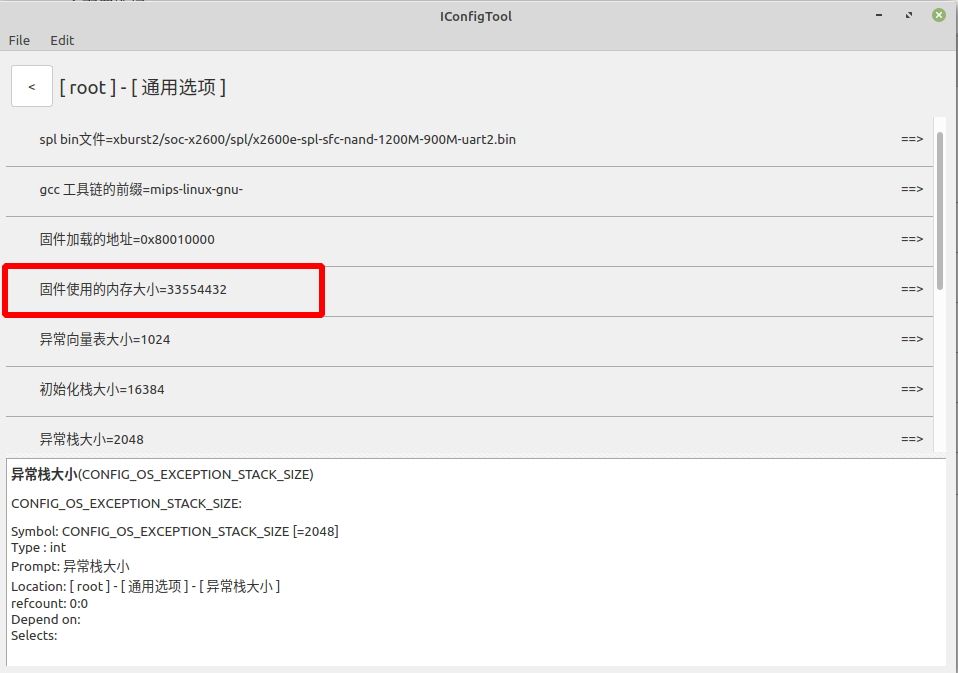
由于H.264解码需要,这里的固件使用内存大小设置为32M
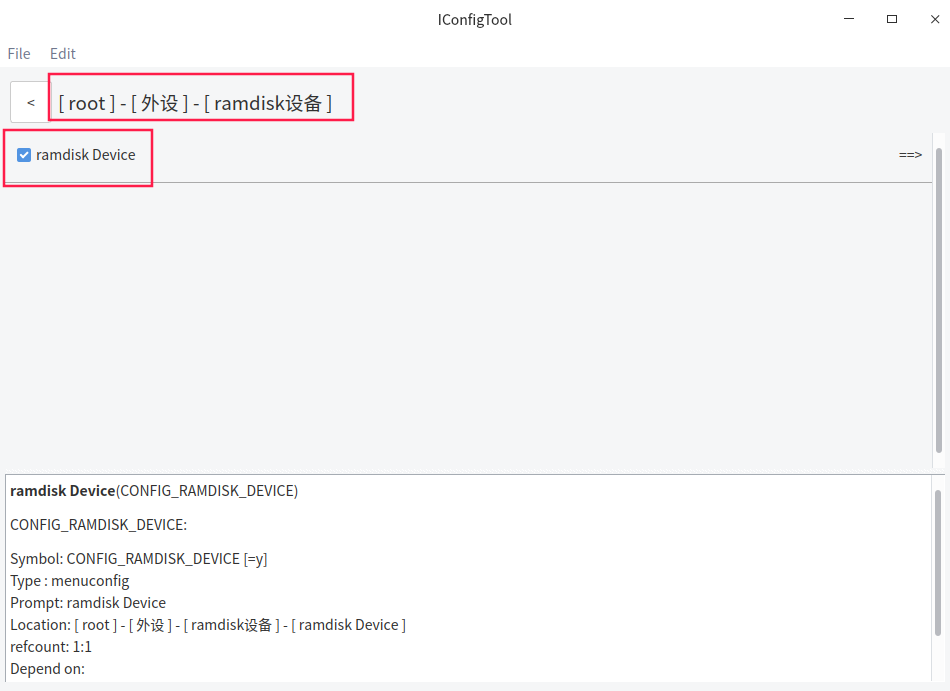
勾选 ramdisk Device
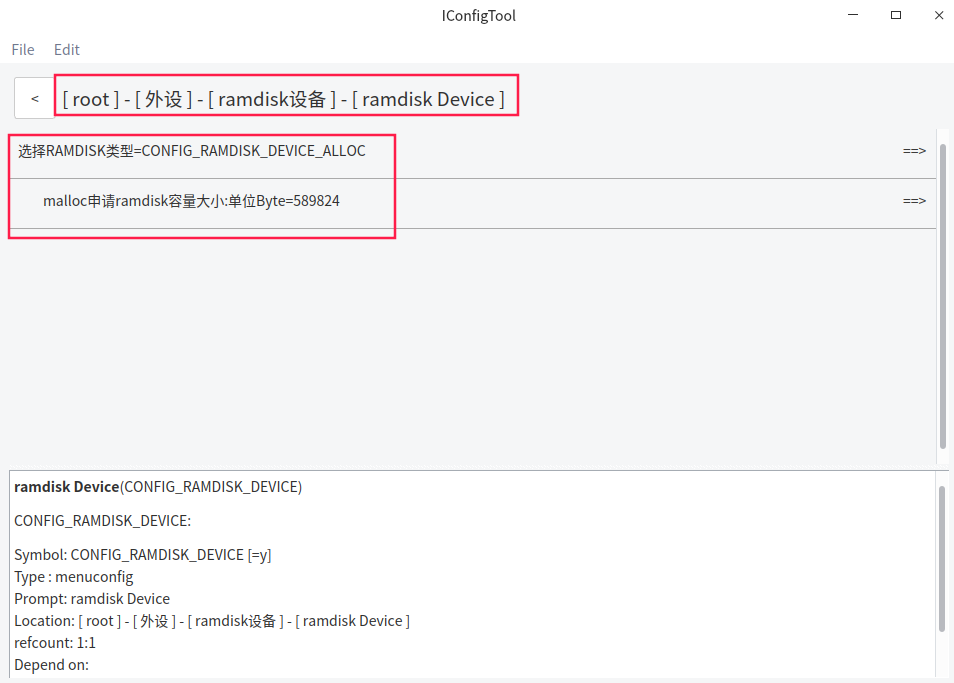
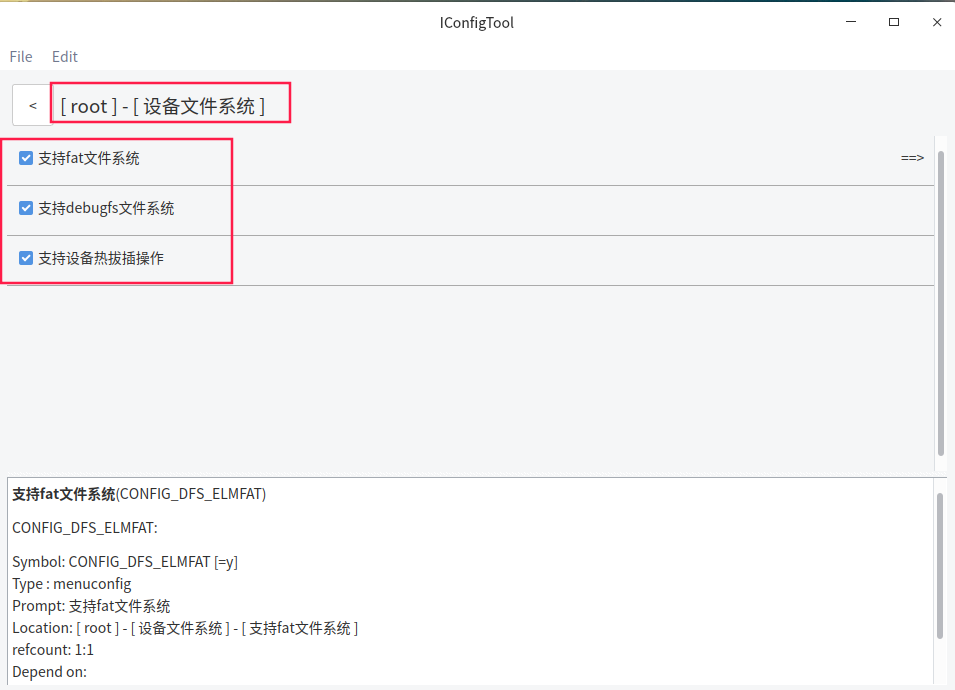
设备文件系统配置
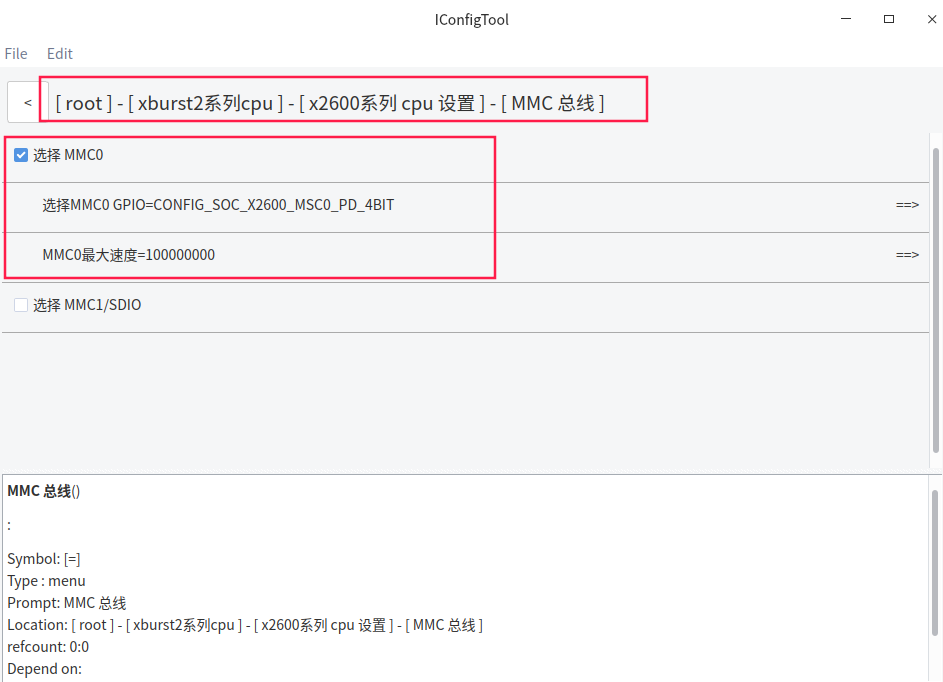
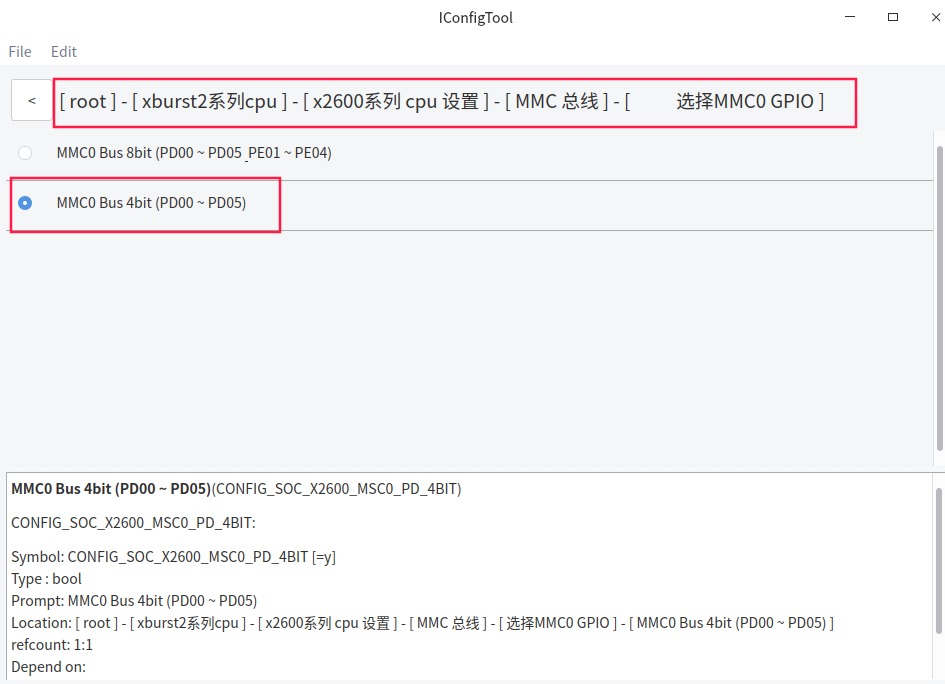
MMC总线配置,配置MMC0
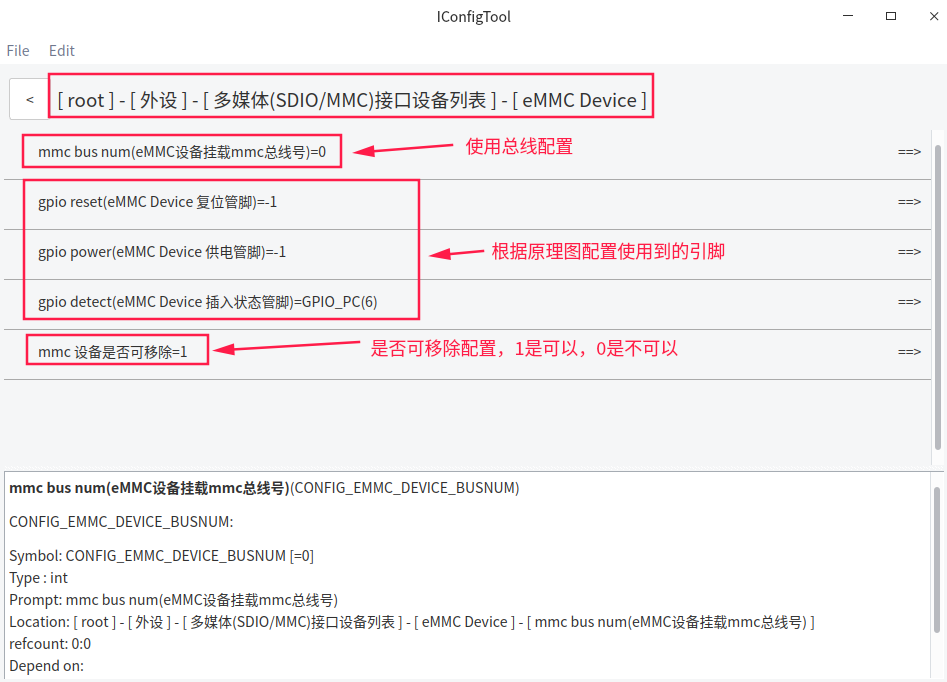
多媒体接口设备列表配置
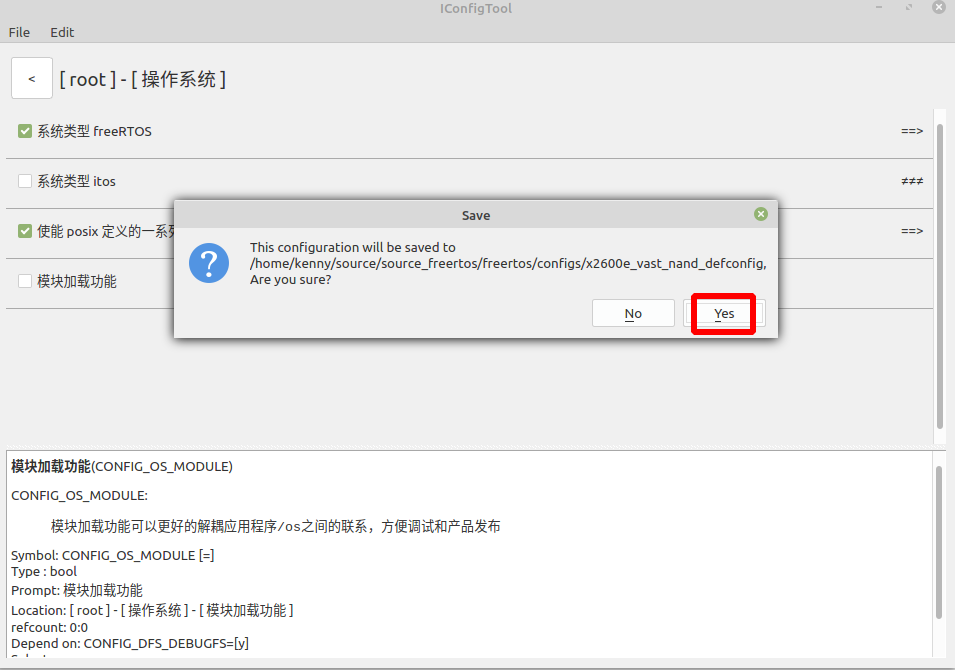
Ctrl + s ,点击 Yes 保存配置
四 测试程序
4.1 h.264解码测试 example
h.264解码测试程序: freertos$ ls example/driver/felix_h264_decoder_example.c 内容如下:
#include <stdio.h>
#include <printf.h>
#include <common.h>
#include <os.h>
#include <stdlib.h>
#include <malloc.h>
#include <include_bin.h>
#include <assert.h>
#include <driver/cache.h>
#include<io.h>
#include <sys/types.h>
#include <sys/stat.h>
#include <fcntl.h>
#include <felix/felix_h264_decoder.h>
#include <lib/nalu_buf.h>
INCBIN(h264, "example/resource/test.h264");
//写文件操作,该文件表示把解码后的一帧写到tf卡上
int write_file(const char * path, void *buf, int size)
{
int fd = open(path, O_RDWR | O_CREAT, 0777);
if (fd < 0) {
printf("Error open %s fail \n", path);
return -1;
}
write(fd, buf, size);
close(fd);
return 0;
}
void felix_h264_decoder_test(void)
{
int width = 1280, height = 720;
void *nv12 = memalign(256, ALIGN(width*height*3/2, cache_line_size()));
assert(nv12);
struct nalu_buf *nalu_buf = nalu_buf_init(256*1024);
assert(nalu_buf);
struct felix_h264_decoder_param param = {
.width = width,
.height = height,
};
struct felix_h264_decoder *decoder = felix_h264_decoder_init(¶m);
if (!decoder)
goto delete_nalu_buf;
void *data = (void *)h264Data;
int size = h264Size;
int count = 0;
while (1) {
int len = 0;
struct nalu_frame *frame = nalu_buf_write(nalu_buf, data, size, &len);
size -= len;
data += len;
if (!frame) {
if (!len)
break;
continue;
}
int ret = felix_h264_decoder_decode(decoder, frame->data, frame->size, nv12);
nalu_frame_delete(frame);
if (ret)
continue;
if (count++ == 20) {
int w = 400, h = 400;
void *y = memalign(256, w*h);
unsigned char *s = nv12 + (width-w)/2;
unsigned char *d = y;
int i, j;
for (i = 0; i < h; i++) {
for (j = 0; j < w; j++) {
d[j] = s[j];
}
d += w;
s += width;
}
//取中间一帧写到tf上(/mmcblk0p1/nv12_temp)
write_file("/mmcblk0p1/nv12_temp",nv12,width*height*3/2);
printf_disable_time_stamp();
dump_mem32_c_style(y, w*h, 8);
free(y);
}
}
felix_h264_decoder_deinit(decoder);
delete_nalu_buf:
nalu_buf_deinit(nalu_buf);
free(nv12);
}
4.2 编译和使用测试程序
修改 vendor/vendor.c ,测试h.264解码 内容如下:
#include <stdio.h>
#include <../example/driver/felix_h264_decoder_example.c>


void vendor_init(void)
{
    felix_h264_decoder_test();  //测试解码并且写到tf卡上,然后放到电脑上进行预览
    printf("vendor init...\n");
}
编译烧录以后,开机运行。tf卡目录下生成如下文件:
$ ls /mmcblk0p1/
nv12_temp
4.3 图片预览
把TF卡放到电脑端,导出图片nv12_temp,使用软件7yuv进行预览,如下图所示:
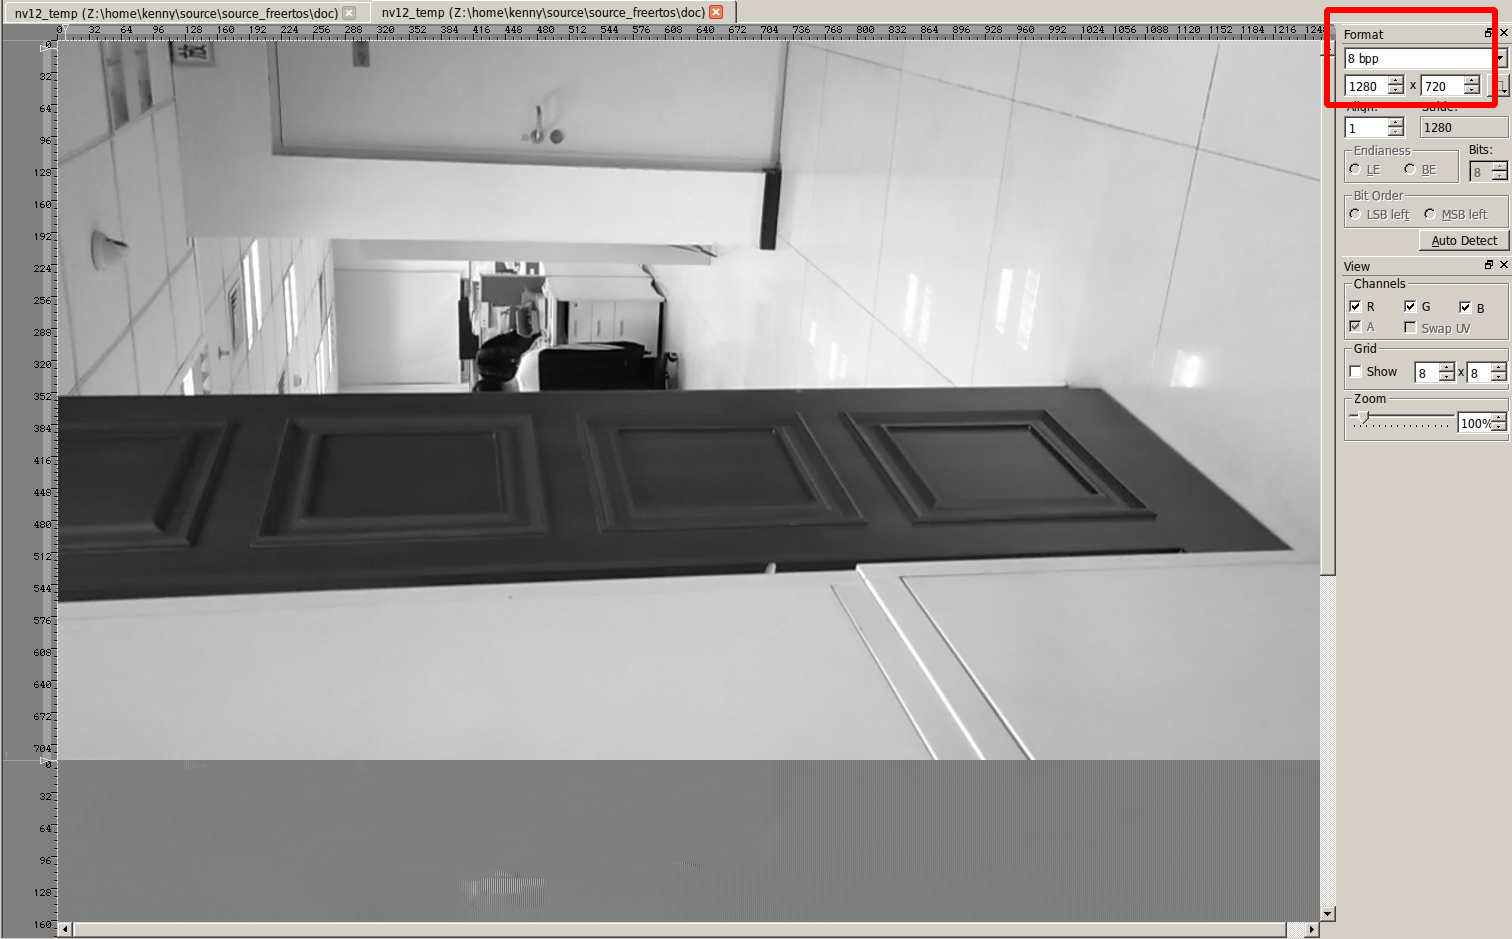
分辨率选择:1280x720
五 编译和烧录
5.1 工程编译
编译命令如下:
cd freertos/

$ source build/envsetup.sh

$ make x2600e_vast_nand_defconfig

$ make
5.2 工程烧录
烧录工具配置如下:
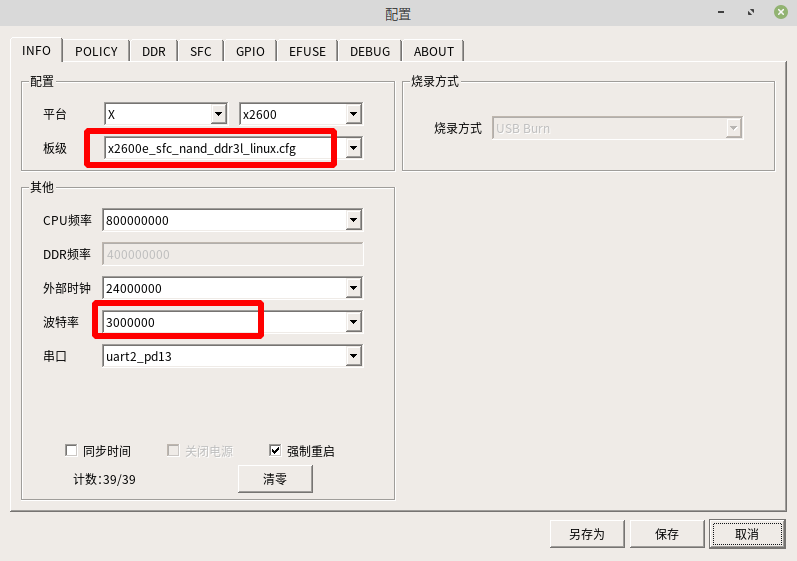
平台选择: x2600
板级选择:x2600e_sfc_nand_ddr3l_linux.cfg
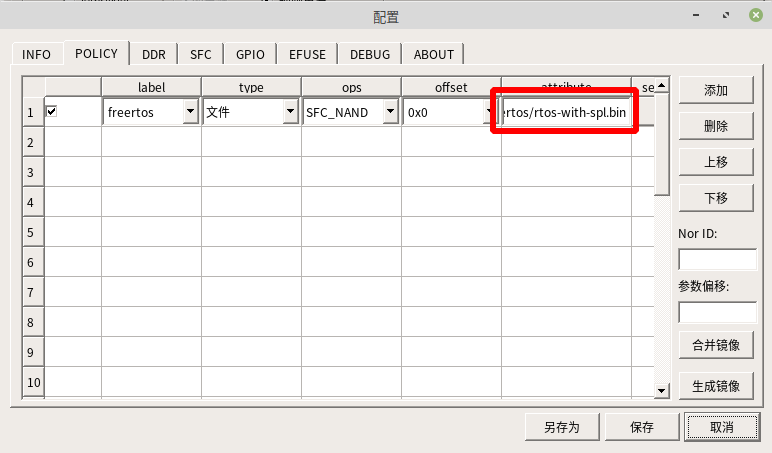
烧录的文件选择:freertos/rtos-with-spl.bin
label的名称要与 SFC 中分区信息的Partition name 一致。
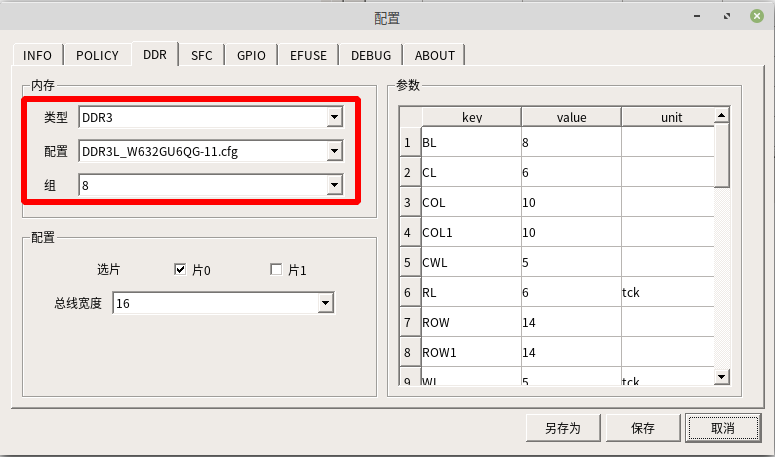
保持默认就可以。
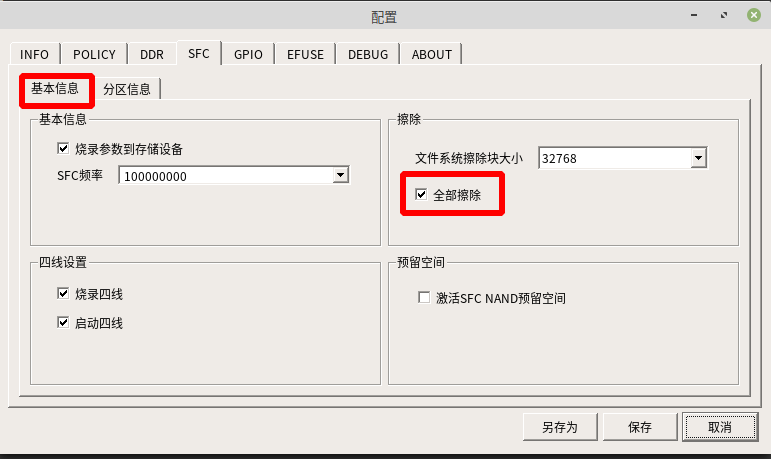
第一次烧录需要勾选全部擦除。
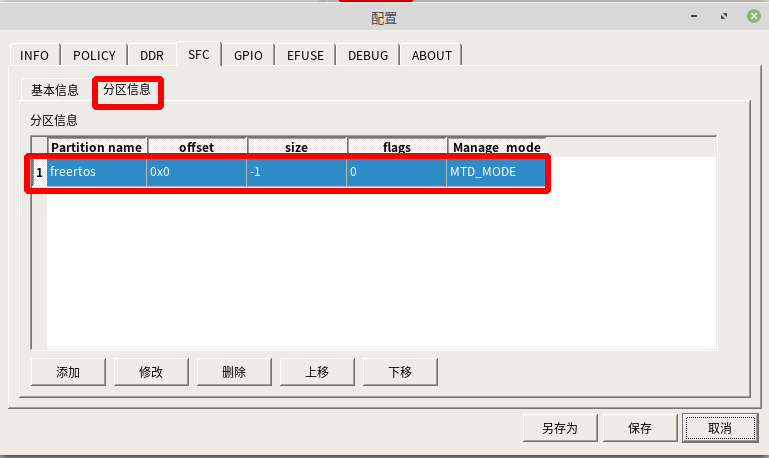
Partition name 为 freertos ,这里的名称可以修改
Manage mode选择 MTD_MODE
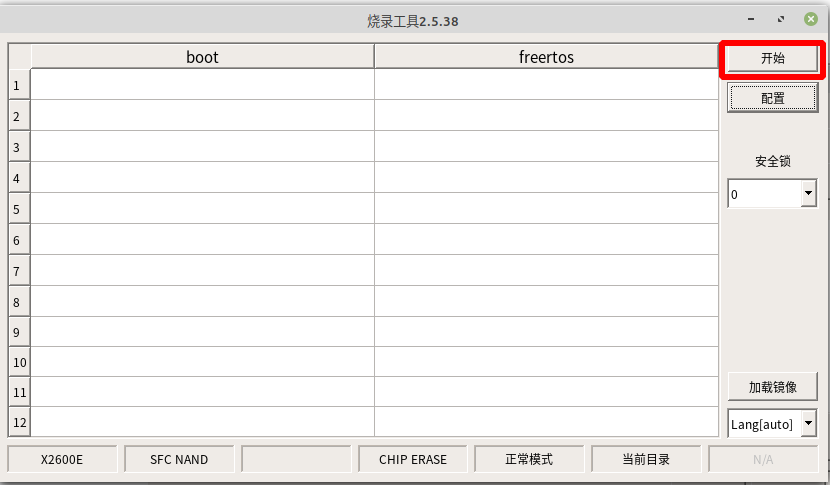
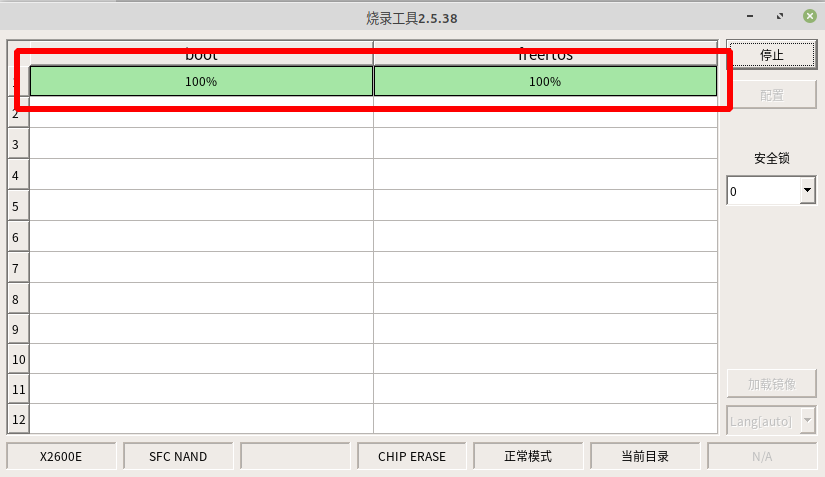
保存烧录工具配置以后,点击开始进行烧录。先按住开发板BOOT_KEY键不放,然后按下RST_KEY按键以后,进入烧录模式,烧录成功的界面如下:
六 API说明
头文件 felix_h264_decoder.h , 路径为:freertos$ ls ./xburst2/soc-x2600/vcodec/felix/felix_h264_decoder.h
freertos/xburst2/soc-x2600/vcodec/felix/felix_h264_decoder.h 文件内容如下:
#ifndef _FELIX_H264_DECODER_H_
#define _FELIX_H264_DECODER_H_

struct felix_h264_decoder_param {
    int width;
    int height;
};

struct felix_h264_decoder;

struct felix_h264_decoder *felix_h264_decoder_init(struct felix_h264_decoder_param *param);

int felix_h264_decoder_decode_nv12_separate(
    struct felix_h264_decoder *decoder, void *src_, int src_size, void *y_, void *uv_);

int felix_h264_decoder_decode(
    struct felix_h264_decoder *decoder, void *src, int src_size, void *nv12);

void felix_h264_decoder_deinit(struct felix_h264_decoder *decoder);

#endif /* _FELIX_H264_DECODER_H_ */