X1600 FB应用开发
以 X1600e HALLY6_BASEBOARD_V2.0 开发板为例进行说明。
1 软件配置
1.1 lcd和背光相关配置
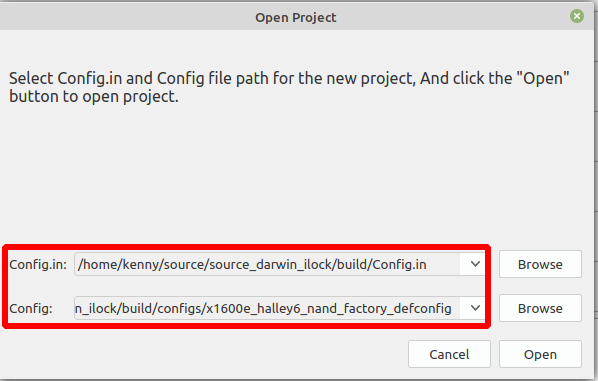
使用IConfigTool选择配置文件 x1600e_halley6_nand_factory_defconfig
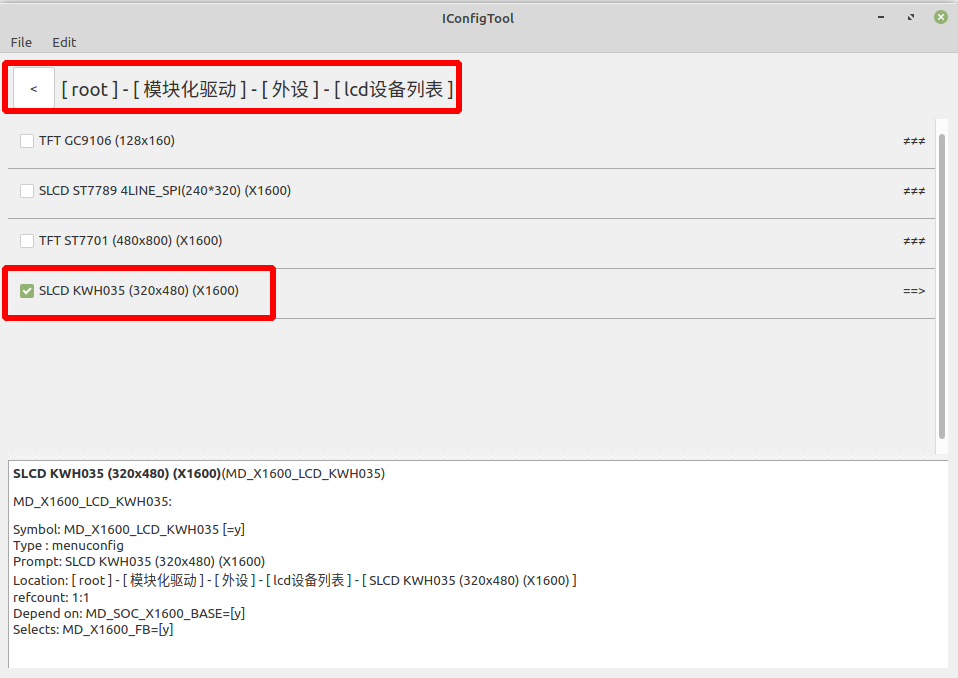
lcd相关配置
选择lcd具体设备, x1600使用的lcd有多种, 根据实际情况选择.
进入配置目录
(不同 lcd在不同板级设备引脚可能不同, 要根据原理图配置.)
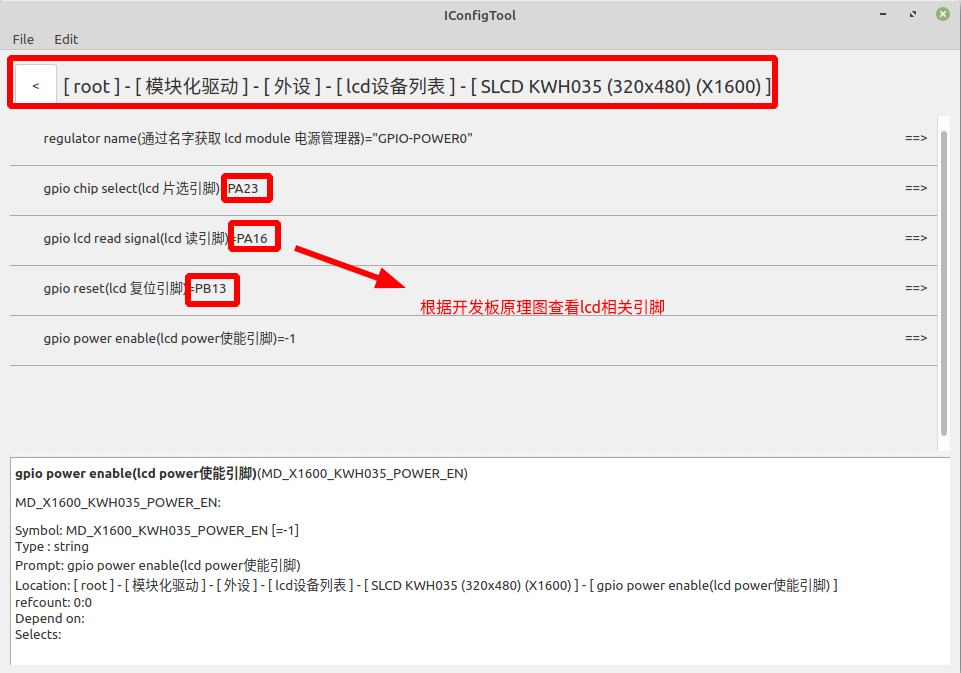
此设备gpio backlight enable不设置, 在背光驱动里面单独配置. 请查��看设备原理图上面的具体引脚进行配置.

背光配置
进入下面的背光设备列表目录
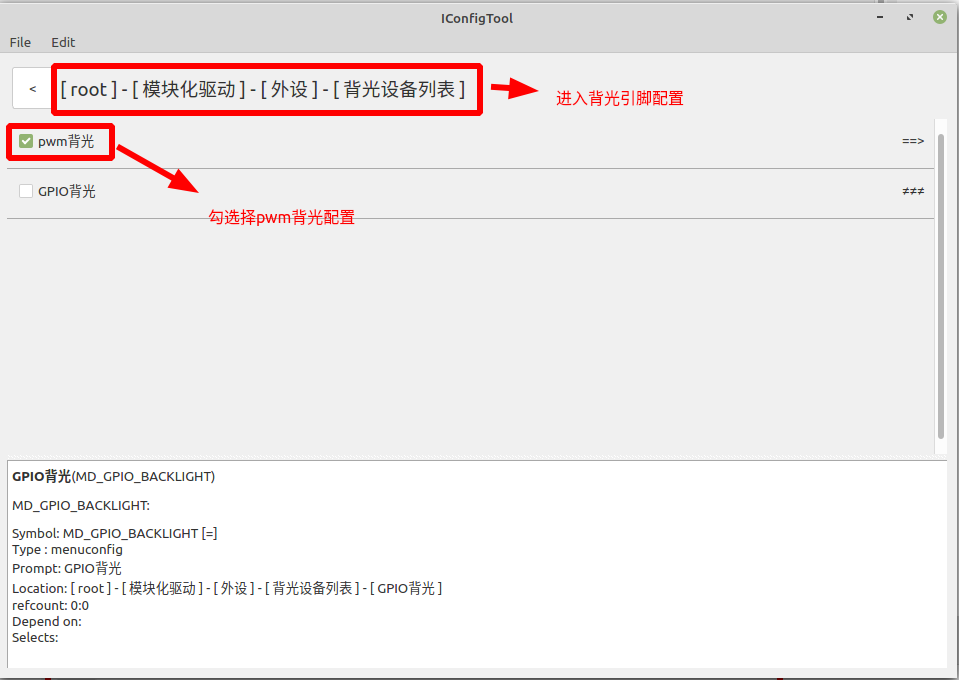
(不同的 lcd在不同板级设备背光引脚可能不同, 要根据原理图配置.)
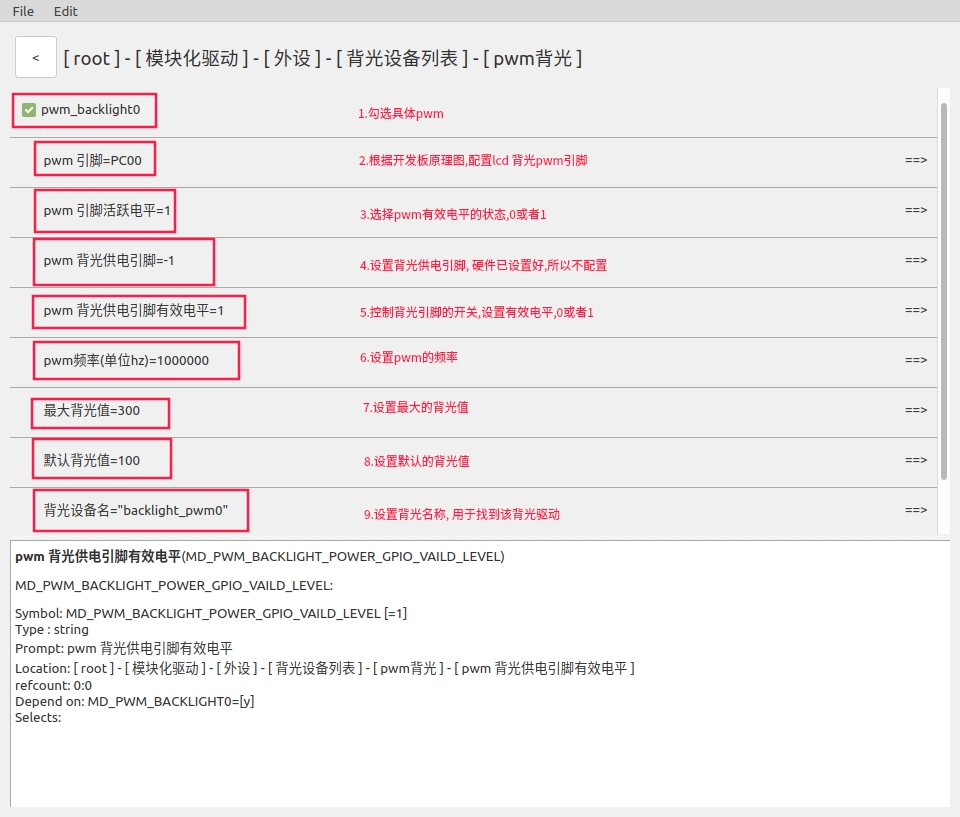
pwm 引脚活跃电平(有效电平)配置 0 或者 1, 需要查看设备原理图来配置.
pwm 背光供电引脚. 查看原理图, 如果硬件电路有设计, 则需要配置该引脚.
pwm 背光供电有效电平配置 0 或者 1, 需要查看设备原理图来配置.
当前的屏幕亮度比例 = (默认背光值 / 最大亮度值) * %100. 背光值可以在进入系统后修改, 最大背光值进入系统后不可修改.
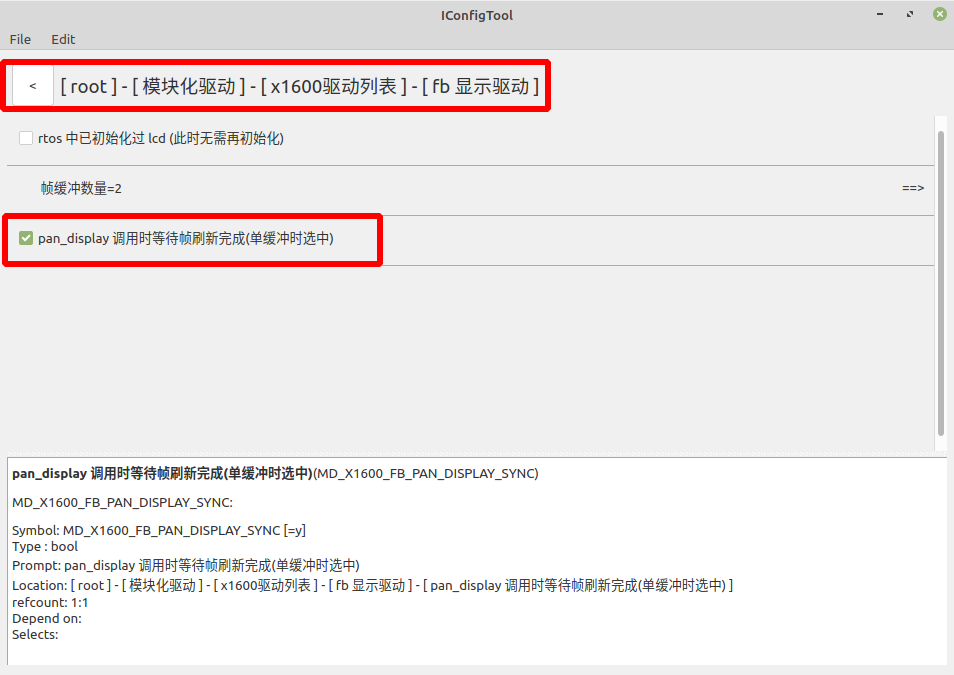
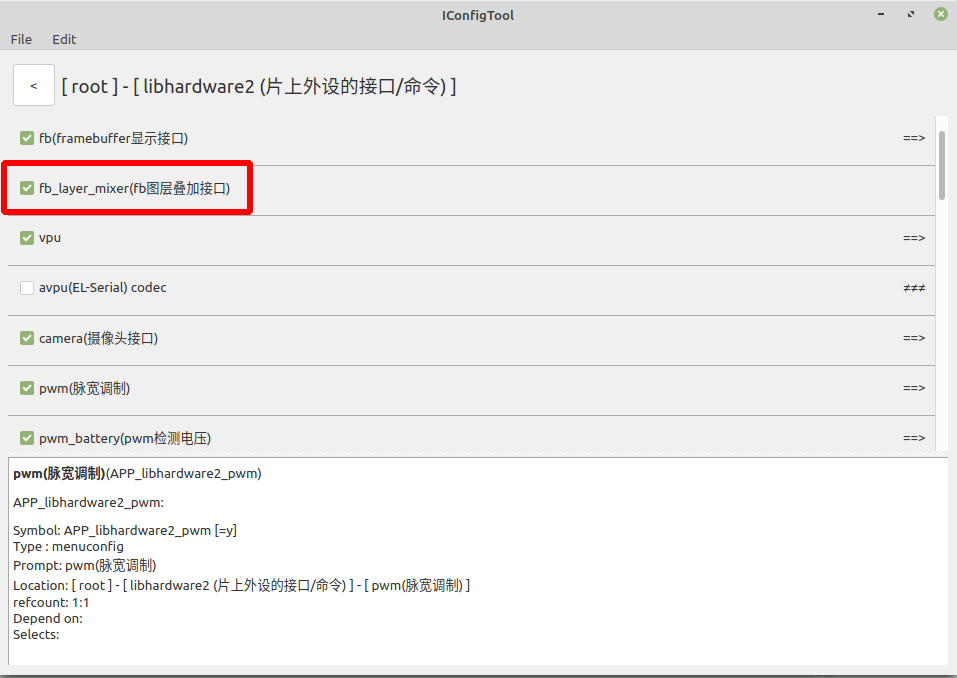
选择fb相关的驱动
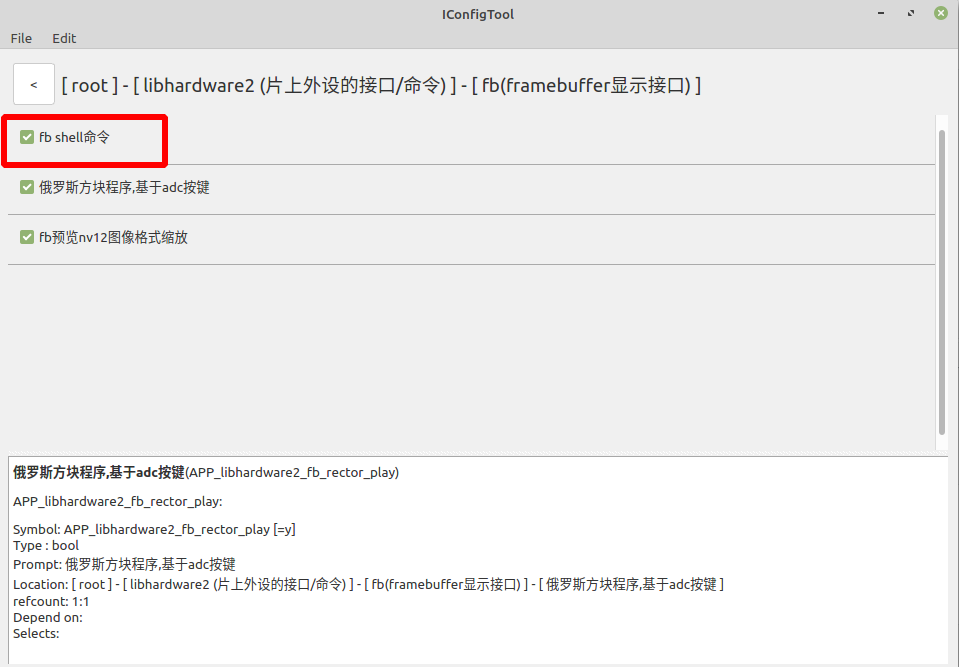
选择fb 命令
配置好后, 保存配置.
2 编译烧录
在工程编译目录/build下, 使用如下命令.
上面例子配置使用的是 x1600e_halley6_nand_factory_defconfig, 保存后, 重新编译.
(请根据自己改动的配置, 重新编译. 重新编译配置很重要, 否则上述配置里的修改将不会编译进工程里面.)
make  x1600e_halley6_nand_factory_defconfig    # 重新编译配置
make apps                           # 编译模块
make buildroot                      # 打包文件系统
把编译好的文件系统重新烧录到设备. 烧录请参考: 烧录方法
3 调试
检查fb驱动是否正常安装
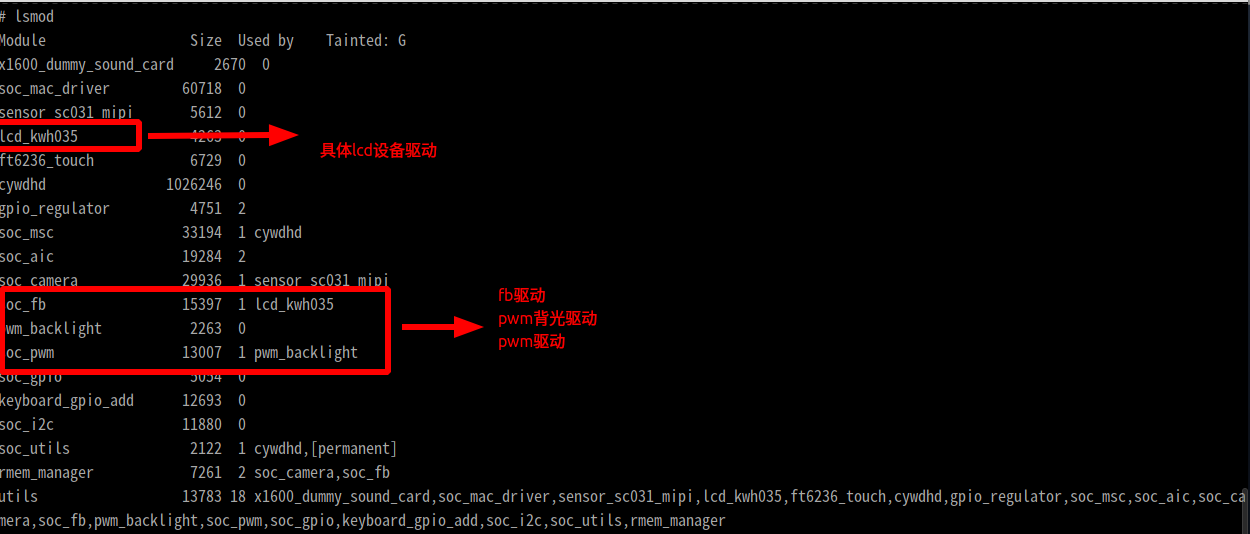
首先开机启动后, 使用lsmod命令查看驱动是否安装成功. 需要有下面4个驱动, 否则屏幕不能正常使用.
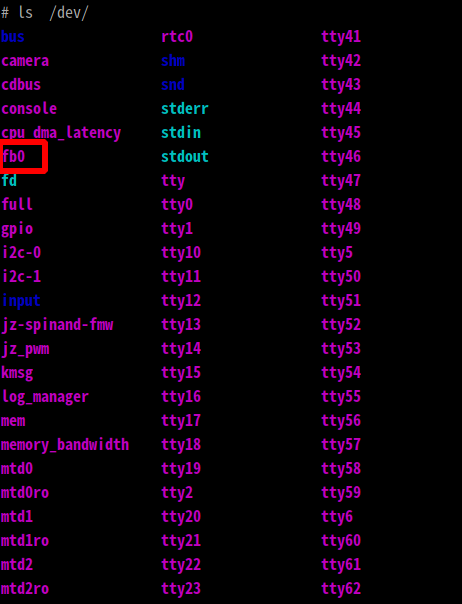
查询设备列表ls /dev, 需要有fb设备. 否则fb驱动安装失败.
安装失败, 请重新检查上面步骤的操作. 有没有配置正确, 有没有保存成功, 有没有成功编译.
3.1 使用 cmd_fb工具实现显示效果
3.1.1 使能lcd, fb设备
如果/dev目录下没有fb设备, 表示lcd或者fb驱动未初始化成功. 请重新检查上述配置, 编译. 烧录操作
# 使能 fb 设备,上电并初始化.
cmd_fb enable /dev/fb0;

# 在某一帧绘制一个方形数据, 绿色.
# x, y: 绘制像素点的起始位置.(默认是x=0, y=0)
# width, height: 绘制方块的宽度, 高度.(默认是lcd设备宽度, 高度)
# frame_index: 根据自己设置的帧缓冲选择. 上述我设置fb0帧缓冲数为2, frame_index可以使用的值0, 1.(默认是0)
cmd_fb draw_rect /dev/fb0 color=0xff00ff00 frame_index=0 x=0 y=0 width=200 height=200;

# 将某一帧缓冲的数据刷新到屏幕上
cmd_fb display /dev/fb0 frame_index=0;
# 将fb设备中的某一帧清除成指定颜色 白色
cmd_fb clear /dev/fb0 color=0xffffffff frame_index=0;

# 将某一帧缓冲的数据刷新到屏幕上
cmd_fb display /dev/fb0 frame_index=0;
3.1.2 设置背光亮度
# 在设备终端使用如下命令查看当前实际亮度
cat /sys/class/backlight/backlight_pwm0/actual_brightness

# 查看最大亮度
cat /sys/class/backlight/backlight_pwm0/max_brightness

# 设置在0 - max_brightness区间的亮度
echo 200 > /sys/class/backlight/backlight_pwm0/brightness
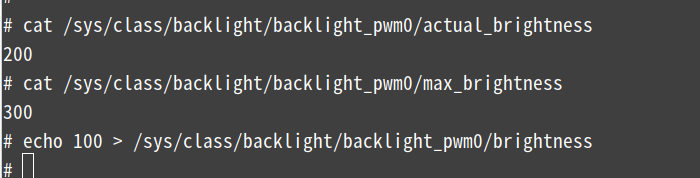
重新设置背光值后, 可以观察到屏幕的亮度变化.
可以使用cmd_fb --help查询参数具体含义和例子.
_cmd_fb命令的更多使用方法可以参考文档 Linux辅助开发 中FrameBuffer章节.
3.2 使用fb API编写程序实现显示效果
3.2.1 编写测试程序
将如下代码编译, 运行, 轮流显示各种颜色.
#include <stdio.h>
#include <stdlib.h>
#include <string.h>
#include <unistd.h>
#include <libhardware2/fb.h>

/* 绘制方形, 数据长度为32位.
** 向一块fb内存写入数据
*/
static void draw_rect32(unsigned int *p, int x, int y, int x1, int y1,
                unsigned int color, struct fb_device_info *info)
{
    p = (void *)p + y*info->line_length + x*4;

    int i, j;
    for (i = 0; i < y1 - y; i++){
        for (j = 0; j < x1 - x; j++) {
            p[j] = color;
        }
        p = (void *)p + info->line_length;
    }
}

/* 绘制一个方形
** int x, int y: 绘制图像的起始点
** int weight, int height: 绘制图像的宽高
*/
static void draw_rect(void *mem, int x, int y, int width, int height,
                unsigned int color, struct fb_device_info *info)
{
    int xres = info->xres;
    int yres = info->yres;
    int x1 = (width < 0) ? xres : x + width;
    int y1 = (height < 0) ? yres : y + height;

    if (x1 > xres)
        x1 = xres;

    if (y1 > yres)
        y1 = yres;

    if (x < 0)
        x = 0;

    if (y < 0)
        y = 0;

    int bytes = info->line_length / info->xres;

    if (bytes < 4) {
        fprintf(stderr, "not support pix fmt: %d %d %d\n",
             info->bits_per_pixel, info->line_length, info->xres);
        exit(-1);
    }
    draw_rect32(mem, x, y, x1, y1, color, info);
}

int main(int argc, char *argv[])
{
    int fd, ret;
    struct fb_device_info info;

    printf("lcd test...\n");

    fd = fb_open("/dev/fb0", &info);
    if (fd < 0) {
        fprintf(stderr, "can`t open /dev/fb0.\n");
        return -1;
    }

    ret = fb_enable(fd);
    if (ret < 0) {
        fprintf(stderr, "can`t enable fb.\n");
        return -1;
    }

    /* 6种不同颜色的数据 */
    unsigned int color[6] = {
        0xffff0000,
        0xffffff00,
        0xffff00ff,
        0xff00ff00,
        0xff00ffff,
        0xff0000ff,
    };

    void *fb_base = info.mapped_mem + info.frame_size * 0;
    for (int i=0; i<12; i++) {
        /* 在指定的内存区域, 填充显示数据 */
        draw_rect(fb_base, 0, 0, -1, -1, color[i%6], &info);
        ret = fb_pan_display(fd, &info, 0);
        if (ret < 0) {
            fprintf(stderr, "fb_pan_display error.\n");
            return -1;
        }
        usleep(500 * 1000);
    }

    fb_close(fd, &info);
    return 0;
}
3.2.2 用到的API介绍
int fb_open(const char *dev_path, struct fb_device_info *info)
功能:打开fb设备驱动,获取fb操作句柄
参数:const char *dev_path    如:/dev/fb0              //fb设备路径
     struct fb_device_info *info                      //需要初始化的info结构体
返回值:成功:fb操作句柄; 失败:-1

int fb_close(int fd, struct fb_device_info *info)
功能:关闭fb设备句柄,释放内存资源
参数:int fd                                           //fb设备操作句柄
     struct fb_device_info *info                      //需要被释放的info结构体
返回值:成功:0; 失败:负数.

int fb_enable(int fd);
功能:使能fb设备,上电
参数:int fd                                           //fb设备操作句柄
返回值:成功:0; 失败:负数.

int fb_pan_display(int fd, struct fb_device_info *info, unsigned int frame_index);
功能:显示/刷新fb指定的帧
参数:int fd                                           //fb设备操作句柄
     struct fb_device_info *info                      //fb设备的相关信息的结构体
     unsigned int frame_index                         //要显示帧的序号
返回值:成功:0; 失败:负数.
fb API更多用法, 可以参考目录libhardware2_API说明文档
3.2.3 测试程序的编译
因为编译需要链接到一些君正提供的库文件, 使用/buildroot/buildroot/output/host/bin/mips-linux-gnu-gcc这个编译工具.
举例, 我的应用lcd_test.c文件在工程目录下的/myapp目录.
进入/myapp目录
cd /myapp    # 进入用户app目录
../buildroot/buildroot/output/host/bin/mips-linux-gnu-gcc lcd_test.c -o lcd_test -lhardware2    # 使用编译器编译 指定库-lhardware2
编译之前, 工程需要被编译过. 编译更多详情, 可以参考文档 代码编译
3.2.4 测试程序的使用
将编译好的模块传输到文件系统有2种方式.
(1). 编译好的模块可以通过adb传输到板子上, 运行. 例如
adb push lcd_test /tmp

# 在设备终端上使用命令, 可以看到颜色刷屏效果.
cd /tmp
./lcd_test
(2). 打包到文件系统; bin文件会在/usr/bin文件目录下面.
cd myapp    # 进入到用户app目录下
cp lcd_test ../buildroot/buildroot/output/target/usr/bin/    # 拷贝模块到文件系统/usr/bin目录下.

# 进入/build目录
make buildroot        # 重新打包文件系统, 重新烧录.

# 在设备终端使用命令, 运行. 可以看到颜色刷屏效果.
lcd_test