AD100 将文件系统中的固件更新到分区
本文基于Freertos系统
一 支持的芯片和存储介质
update_nand命令支持nand flash 存储介质; update_nor命令支持nor flash 存储介质; update_mmc命令支持mmc flash存储介质. update系列命令支持x1000、x1600、x2000、x2600、ad100系列芯片.
二 使用流程
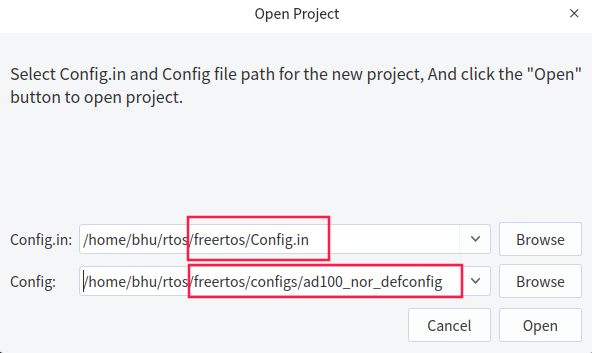
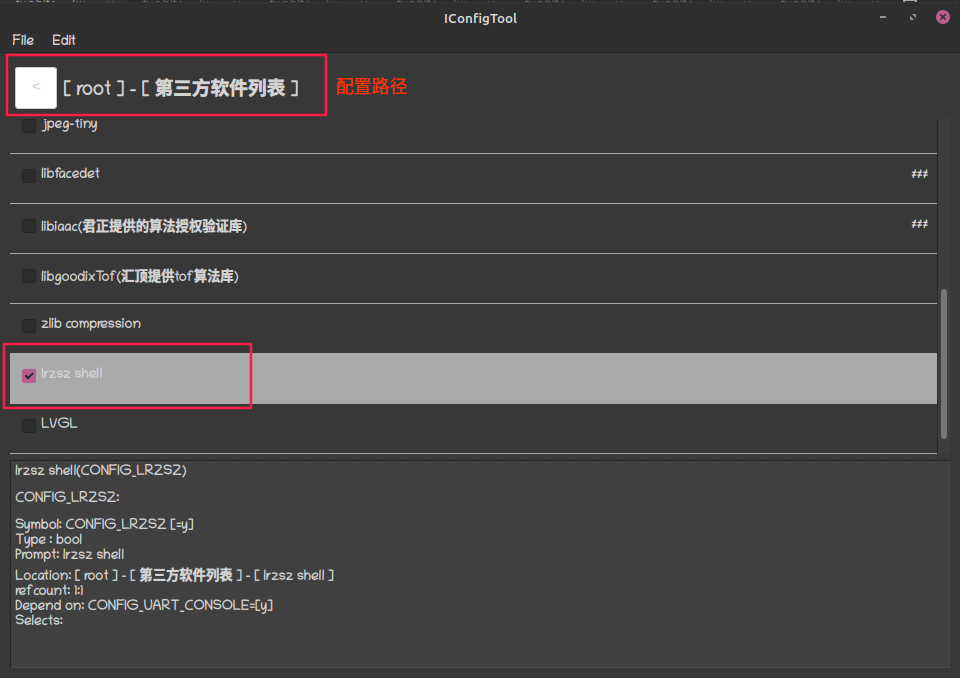
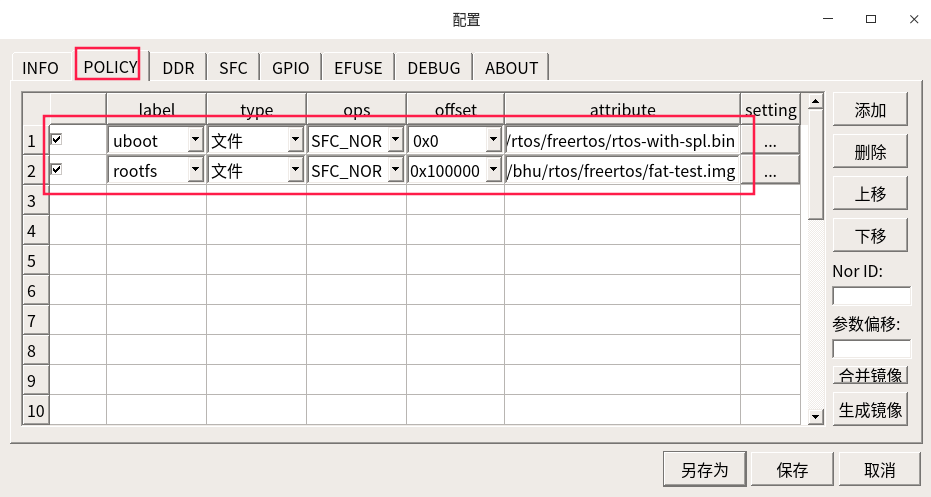
2.1 IConfig Tool配置
以ad100_nor_defconfig为例,打开IConfigTool工具,选择配置文件
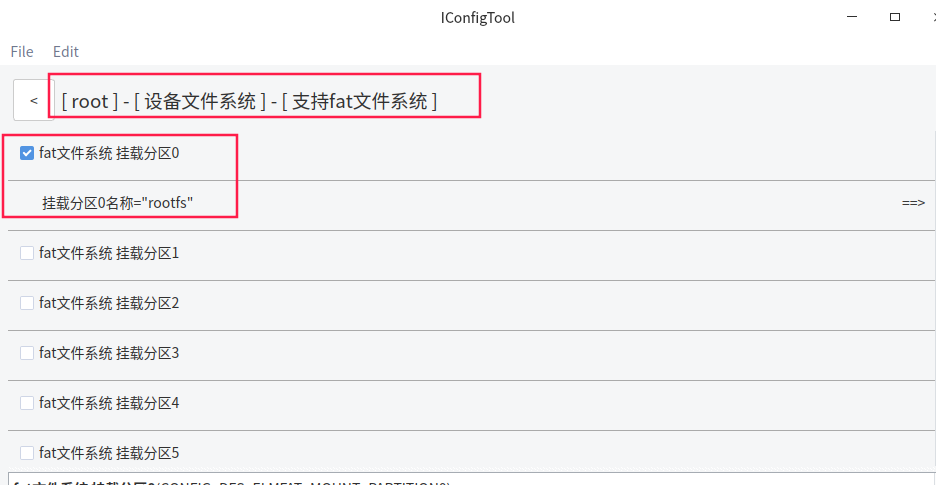
设备文件系统配置
Ramdisk设备配置
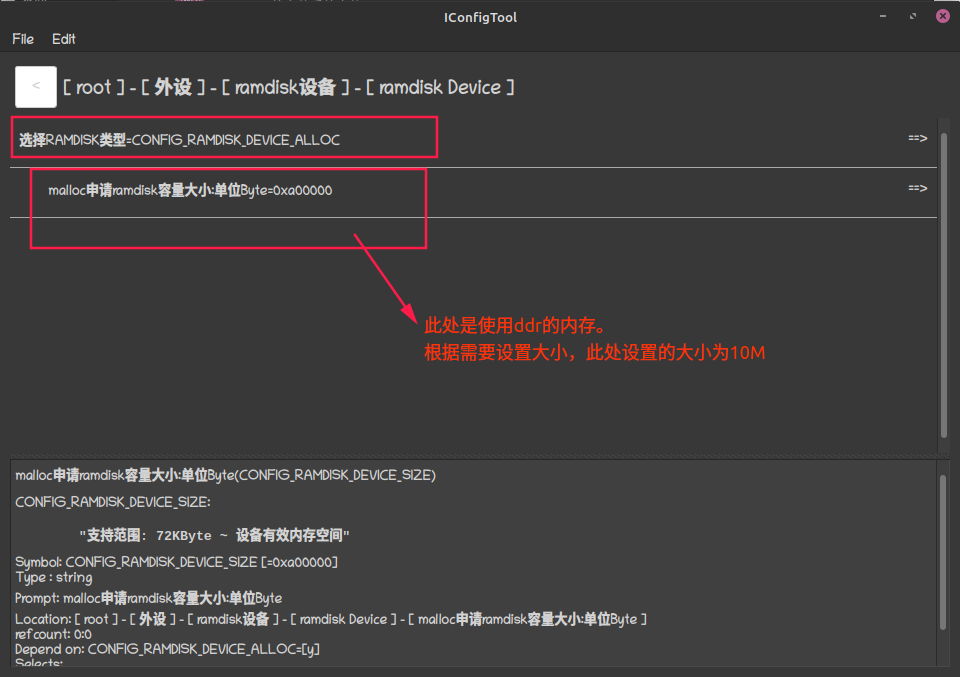
此配置是在ddr中开辟一片空间,挂载根文件目录,因此要根据文件大小来设置ramdisk的容量大小,但是不要超过ddr的大小。 update_nor命令
2.2 命令的使用
Usage:  update_nor <upgrade file name path> <upgrade partition name>
Example:
        update_nor zero.bin rtos
$ update_nor fat-test1.img  rootfs
offset: 0x100000 size: 0x500000   //update分区偏移和大小
file len is : 4194304             //update的文件大小
 update  4194304Bytes [1949.934578]   //update的进度
[1949.934632] update ending...         //update完成的打印
三 调试阶段如何将上位机的固件传输到设备的文件系统中
3.1 通过串口传输
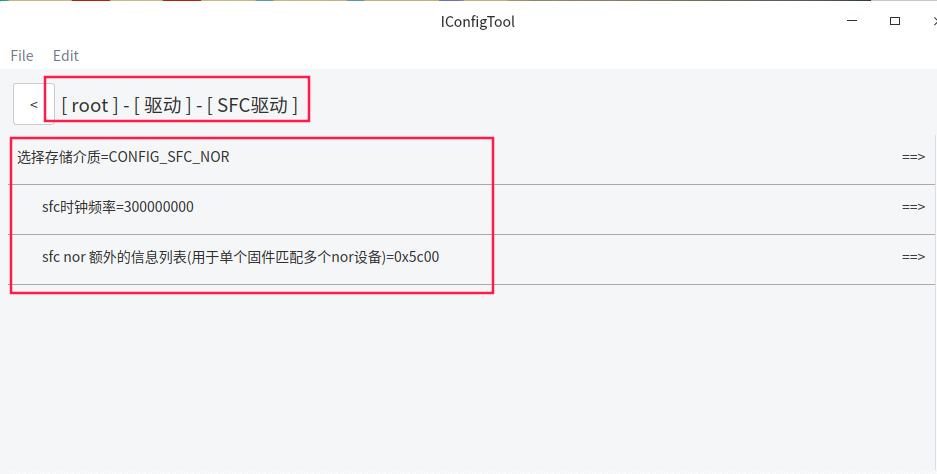
3.1.1 配置选择
3.1.2 命令使用
首先要确保PC端的系统中安装了lrzsz,在Ubuntu系统上,可以使用以下命令进行安装:
sudo apt-get install lrzsz
以 Minicom串口工具 为例,使用crtl + A , S快捷键,选择 zmodem
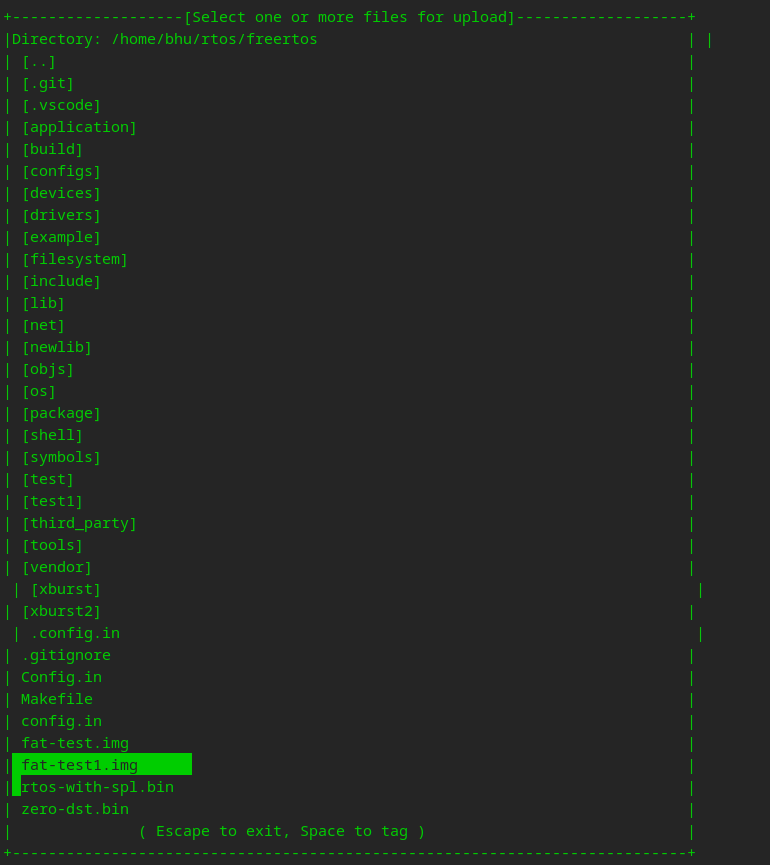
$ ls
Type/Size      Name
<DIR>          rootfs
<DIR>          sys
$
        files received 1                       //空格选中, 回车开始下载
$ ls
Type/Size      Name
<DIR>          rootfs
<DIR>          sys
4194304        fat-test1.img
3.2 通过T卡传输
TF卡使用详细见TF卡
四 编译和烧录
4.1 编译
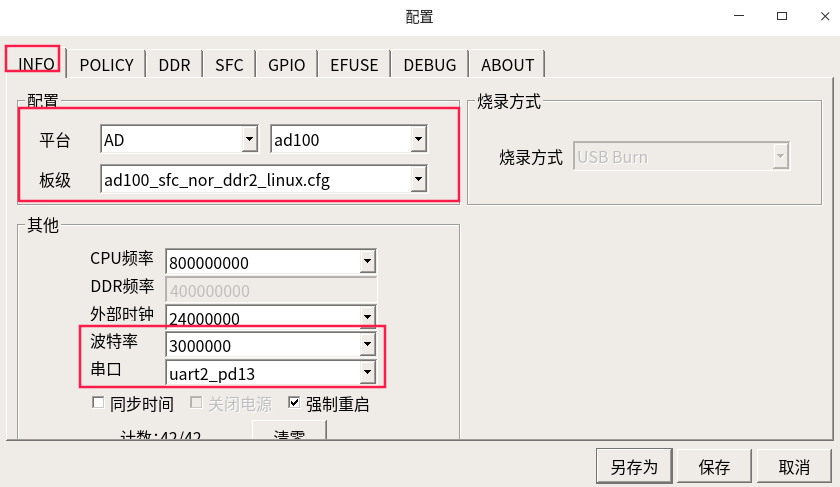
bhu@bhu-PC:~/rtos/freertos$ make ad100_nor_defconfig  //选择编译配置文件
bhu@bhu-PC:~/rtos/freertos$ make
bhu@bhu-PC:~/rtos/freertos$ ls rtos-with-spl.bin
rtos-with-spl.bin                                           //编译出来的文件
4.2 文件系统制作
创建用于烧录的文件系统fat-test.img, 升级用的文件系统fat-test1.img, 为了判断分区是否升级成功,fat-test.img和fat-test1.img里分别创建test和test1文件夹.
bhu@bhu-PC:~/rtos/freertos$ mkfs.fat -S 4096 -C fat-test.img 4096
bhu@bhu-PC:~/rtos/freertos$ mkdir test
bhu@bhu-PC:~/rtos/freertos$ sudo mount -t vfat fat-test.img ./test/
bhu@bhu-PC:~/rtos/freertos$ cd test
bhu@bhu-PC:~/rtos/freertos$ mkdir test
bhu@bhu-PC:~/rtos/freertos$ sudo umount ./test

bhu@bhu-PC:~/rtos/freertos$ mkfs.fat -S 4096 -C fat-test1.img 4096
bhu@bhu-PC:~/rtos/freertos$ mkdir test1
bhu@bhu-PC:~/rtos/freertos$ sudo mount -t vfat fat-test1.img ./test1/
bhu@bhu-PC:~/rtos/freertos$ cd test1
bhu@bhu-PC:~/rtos/freertos$ mkdir test1
bhu@bhu-PC:~/rtos/freertos$ sudo umount ./test1
4.3 烧录
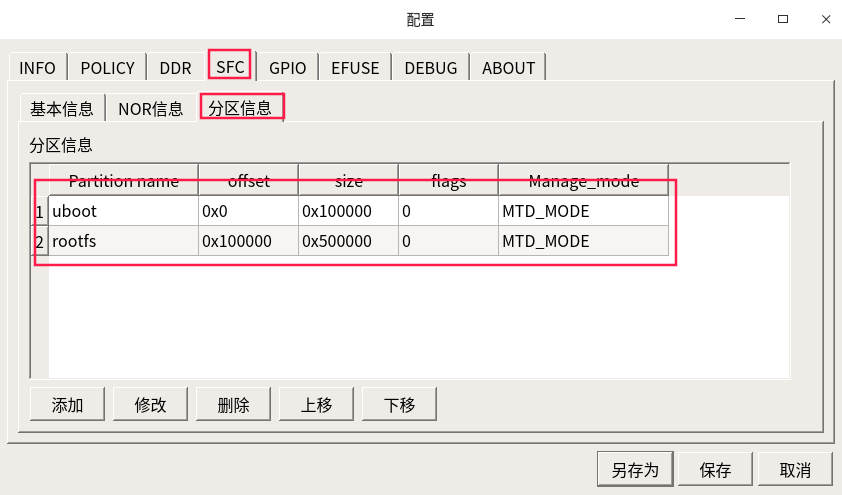
rootfs分区即为二章节设置的分区名称,选择制作出来的文件系统fat-test.img挂载
五 OTA验证
将rootfs分区中的fat-test.img升级为fat-test1.img
$ update_nor fat-test1.img rootfs
offset: 0x100000 size: 0x500000
file len is : 4194304
 update  4194304Bytes [113.110569]
[113.110619] update ending...         //更新完成
$ cd rootfs/
$ ls
Type/Size      Name
<DIR>          test               //更新前rootfs分区文件系统中的文件夹
//重启开发板
$ ls
Type/Size      Name
<DIR>          rootfs
<DIR>          sys
$ cd rootfs/
$ ls                          //更新分区成功,变为新文件系统文件夹test1
Type/Size      Name
<DIR>          test1