AD100 应用签名加密
一 原理介绍
为了保护客户厂商的软件程序不被其对手复制,可以使用AES、2Key-3DES加密对代码进行加密,密码可以是用户提供的User-Key0或芯片内部的Chip-Key(随机数密码).
而sc通过调用SC-ROM接口使用密码进行解密操作,软件不直接访问密码本身,防止密码泄露.
二 软件实现过程
以ad102p_mini_nand_defconfig配置为例
2.1 kernel相关驱动的配置
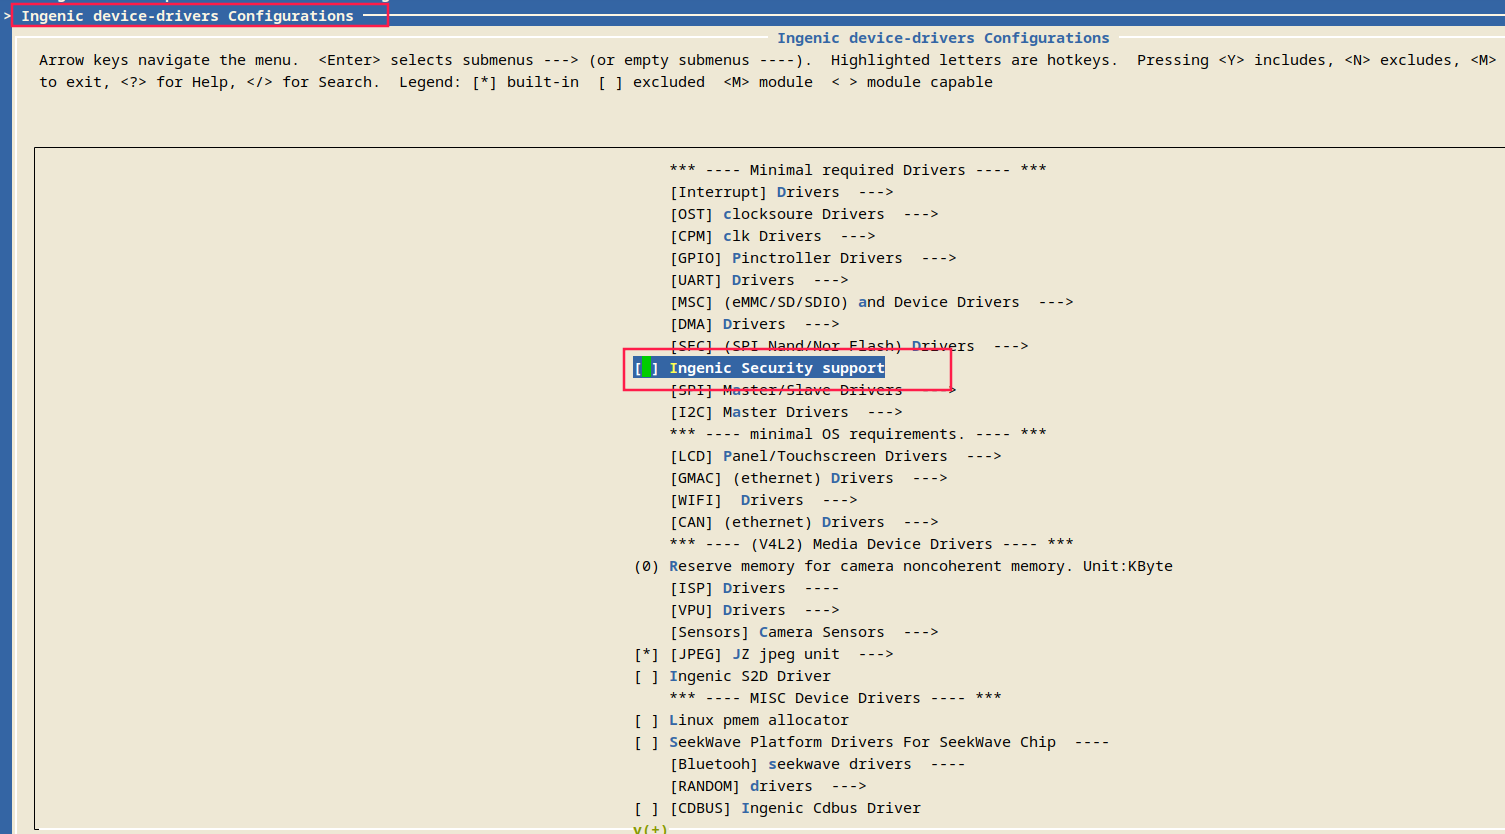
bhu@bhu-PC:~/ad100/kernel/kernel$ make menuconfig
进入Ingenic device-drivers Configurations选项,取消勾选Ingenic Security support,完成后保存配置.
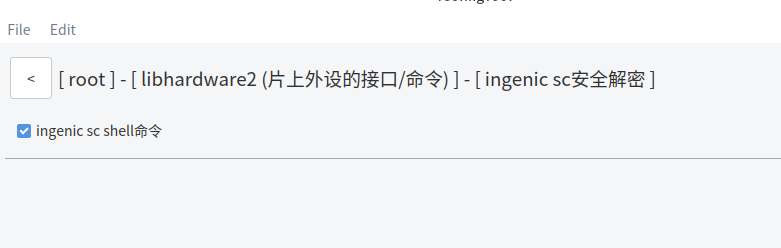
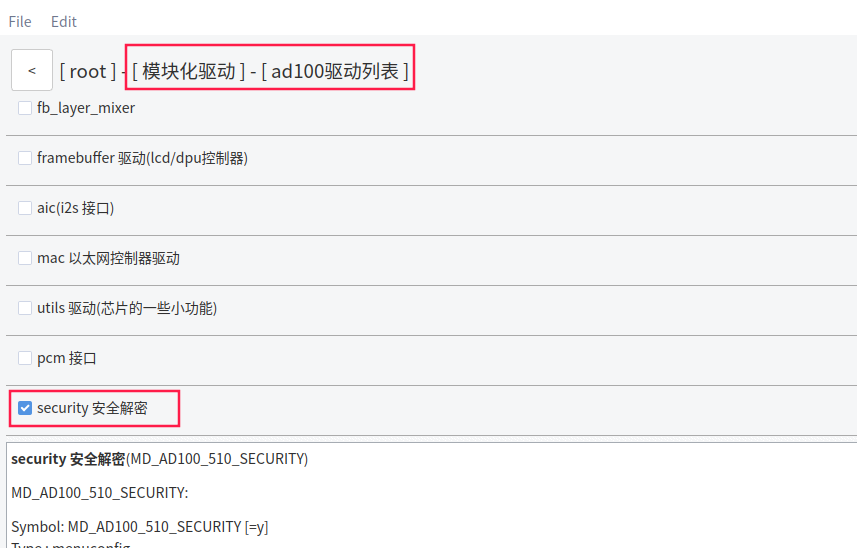
2.2 sc相关配置
勾选sc命令, 用来对应用程序进行解密和验签
勾选sc相关驱动
2.3 编译系统
bhu@bhu-PC:~/ad100/build$ make ad102p_mini_nand_defconfig
bhu@bhu-PC:~/ad100/build$ make
三 相关签名工具使用
3.1 key生成工具
Key 生成工具只有ubuntu版本的,没有windows版本. 用于生成 RAS-Key、User-Key0 和 User-Key1,提供给签名工具和烧录工具使用.
运行命令如下:
bhu@bhu-PC:~/Desktop/cloner-latest-ubuntu/cloner-2.5.54.5-ubuntu_alpha/securitytool/x2000/keytool$ sudo ./keygen-64
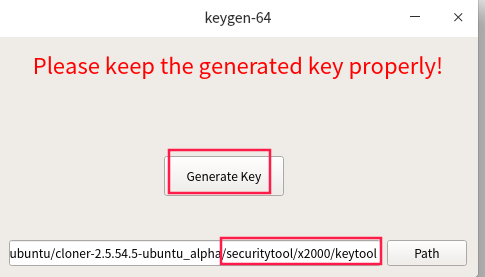
点击 Generate Key 按钮生成签名需要的文件
生成文件路径为:
bhu@bhu-PC:~/Desktop/cloner-latest-ubuntu/cloner-2.5.54.5-ubuntu_alpha/securitytool/x2000/keytool$ ls -lh
总用量 37M
-rw-r--r-- 1 root root  588 6月  26 09:31 key.bin
-rwxrwxr-x 1 root root  22M 4月  29  2024 keygen-32
-rwxrwxr-x 1 root root  16M 4月  29  2024 keygen-64
-rw-r--r-- 1 root root 1.7K 6月  26 09:31 pri_key.pem
-rwxrwxr-x 1 root root  536 4月  28  2024 qm_cn.qm
-rw-r--r-- 1 root root   64 6月  26 09:31 user_key.bin
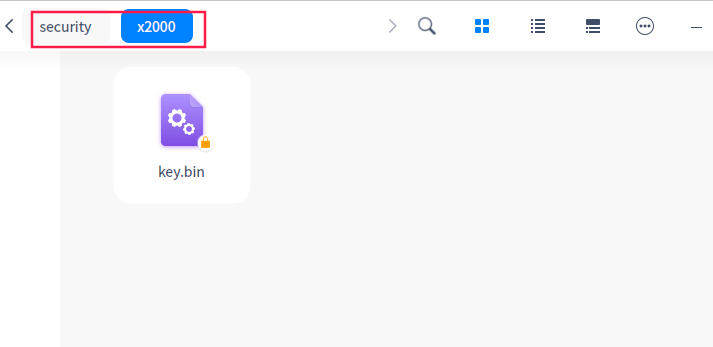
生成 Key 后需要把 key.bin 复制到烧录工具的 security 目录下(保证将key.bin拷贝到签名工具所在的烧录工具对应目录下即可):
注意:生成的下面三个签名文件,需要保存好,同一个板子一旦签名了,再次烧录需要用同一个签名文件的固件,不然烧录会不成功。
key.bin
pri_key.pem
user_key.bin
将 key.bin 拷贝到烧录工具 security/x2000/下:
bhu@bhu-PC:~/Desktop/cloner-latest-ubuntu/cloner-2.5.54.5-ubuntu_alpha/securitytool/x2000/keytool$ cp key.bin ../../../security/x2000/ -rf
将 pri_key.pem 和 user_key.bin 拷贝到烧录工具的 securitytool/x2000/sigtool/security_key下:
bhu@bhu-PC:~/Desktop/cloner-latest-ubuntu/cloner-2.5.54.5-ubuntu_alpha/securitytool/x2000/keytool$ cp pri_key.pem ../sigtool/security_key/ -rf
bhu@bhu-PC:~/Desktop/cloner-latest-ubuntu/cloner-2.5.54.5-ubuntu_alpha/securitytool/x2000/keytool$ cp user_key.bin ../sigtool/security_key/ -rf
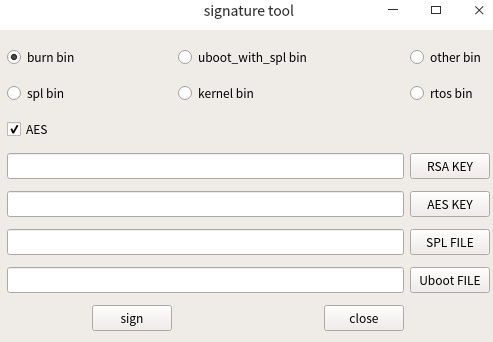
3.2 签名工具
为了便于使用,本文展示签名工具使用windows版本的.
签名工具用于签名、加密客户的固件、应用程序、配置文件,以便保护用户核心数据.
打开签名工具之前,需要先在securitytool/x2000/sigtool/下创建⽂件settings.ini , 写⼊内容:
[debug]
value=1
签名工具路径,运行签名工具如下:
bhu@bhu-PC:~/Desktop/cloner-latest-ubuntu/cloner-2.5.54.5-ubuntu_alpha/securitytool/x2000/sigtool$ sudo ./sigtool-64
3.2.1 签名other.bin
做测试程序test.c
#include <stdio.h>
#include <stdlib.h>
#include <unistd.h>

int main(int argc, char* argv[])
{
    while(1)
    {
        printf("@@@@@@\n");
        sleep(5);
    }
}
编译:
gcc使用的是当前buildroot目录下的output/host/usr/bin/mips-linux-gnu-gcc 首先要确定当前buildroot的目录:
bhu@bhu-PC:~/ad100/build$ cat configs/ad102p_mini_nand_defconfig | grep "buildroot"
APP_br_dir=../buildroot/buildroot24
APP_br_config_file=configs/buildroot/buildroot24_xburst2_mini_adb_gcc1210_defconfig
# APP_br_root_login_keep_buildroot is not set
可知当前buildroot的目录为: buildroot/buildroot24
因此,编译上层应用的gcc为:buildroot/buildroot24/output/host/usr/bin/mips-linux-gnu-gcc
上面test程序的编译方法如下:
bhu@bhu-PC:~/ad100/build/output$ CC=/home/bhu/ad100/buildroot/buildroot24/output/host/usr/bin/mips-linux-gnu-gcc
bhu@bhu-PC:~/ad100/build/output$ $CC test.c -lhardware2 -o test
加密测试程序test的文件:
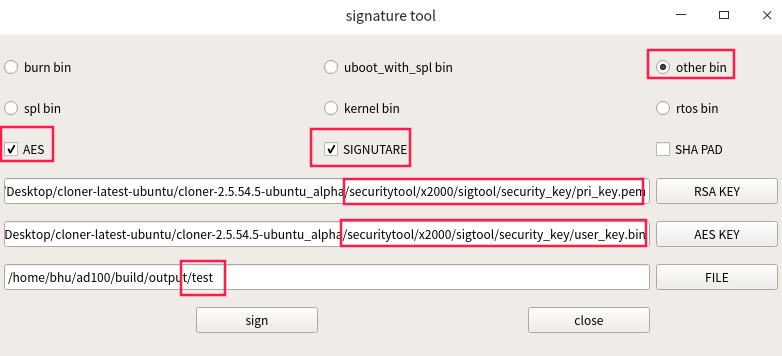
生成加密后的文件:test-dst.bin
adb push 到开发板:
adb push test-dst.bin /usr/data/
开发板解密:
# cmd_sc src=/usr/data/test-dst.bin
src_file    : /usr/data/test-dst.bin
dst_file    : /usr/data/test-dst.bin_dst
相关源码见libhardware2/src/cmds/ingenic_sc_main.c
测试解密后是否相同:

注意:
因为当前签名工具会对other.bin签名时按照16byte对齐, 不足的部分会自动补0, 所以解密后的文件的md5值可能跟源文件的md5值有所不同, 但是不影响使用.
四 烧录工具配置
烧录工具的配置如下:
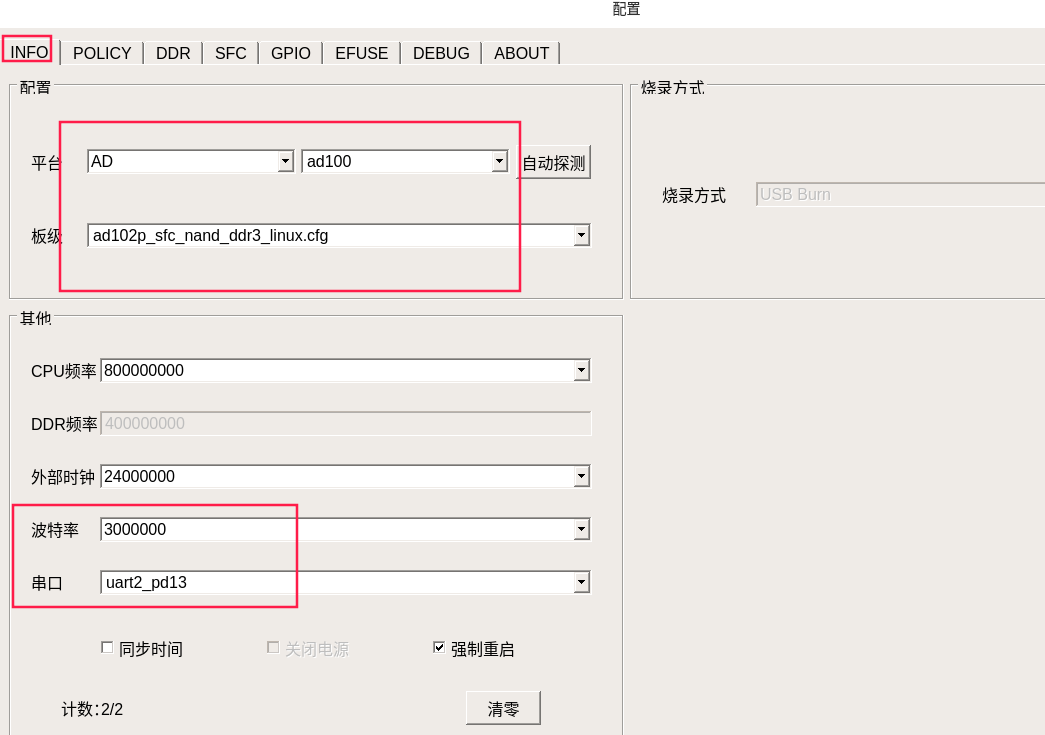
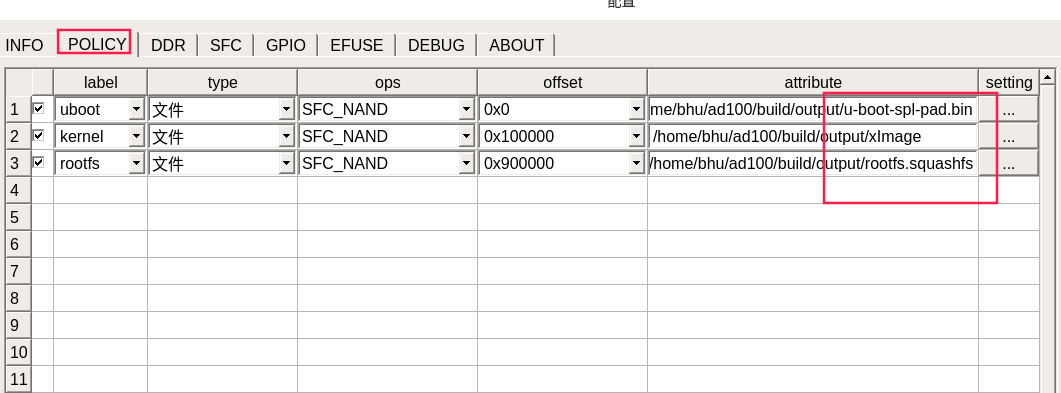
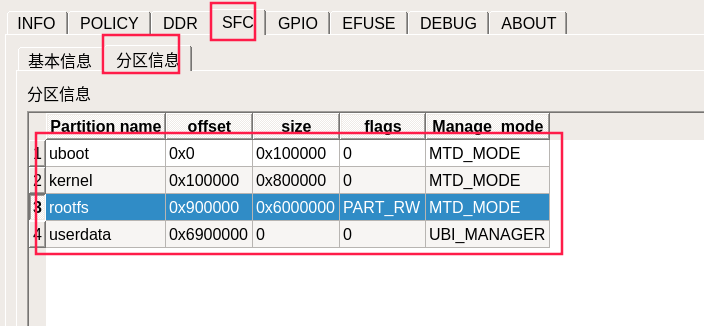
**注:**rootfs 的 Manage mode里面的模式选择为:MTD_MODE
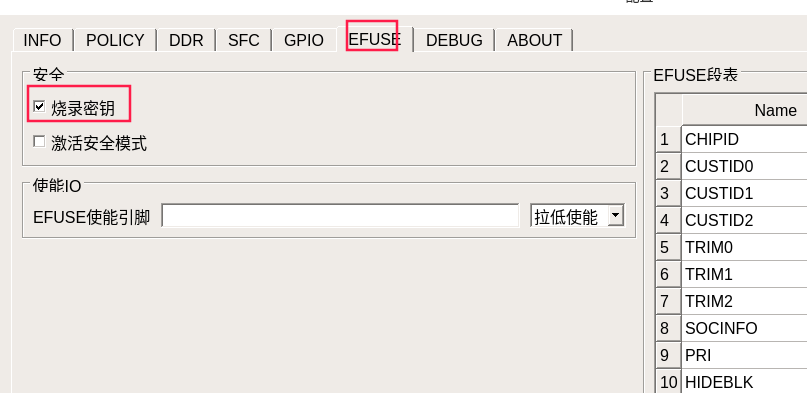
注意:硬件上, EFUSE需要保持供电